

In the previous article, we learned How to install NGINX, PHP, and MySQL on Ubuntu 18.04 Google Cloud VM instance. For executing the MySQL command we used MySQL Shell. MySQL shell is the good option for executing small queries. For the large-scale development, we need a graphical user interface.
phpMyAdmin is a free, open source web-based administration tool for MariaDB and MySQL. phpMyAdmin is written in PHP. It is one of the most popular administration tools for MariaDB and MySQL.
This article is a Step-by-Step guide for installing phpMyAdmin on Ubuntu 18.04.
Prerequisites
As we mentioned previously phpMyAdmin is a web-based tool written in PHP. To use phpMyAdmin, we need to first complete the LEMP (Linux, Nginx, MySQL, and PHP) installation on our Ubuntu 18.04 Google Cloud Compute Engine VM Instance.
We are assuming you have proper access on Ubuntu Server to execute the "sudo" commands in the terminal.
Step 1 Install phpMyAdmin
sudo apt-get updateTo install the phpMyAdmin on Ubuntu 18.04 execute the following command.
sudo apt-get install phpmyadminDuring the installation, we will prompt for the web server configuration. In the list, we have only two options. First one is apache and another one is lighttpd. Since we are using NGINX we need to bypass this prompt. Use the tab from your keyboard to highlight the "<ok>" button and hit enter.

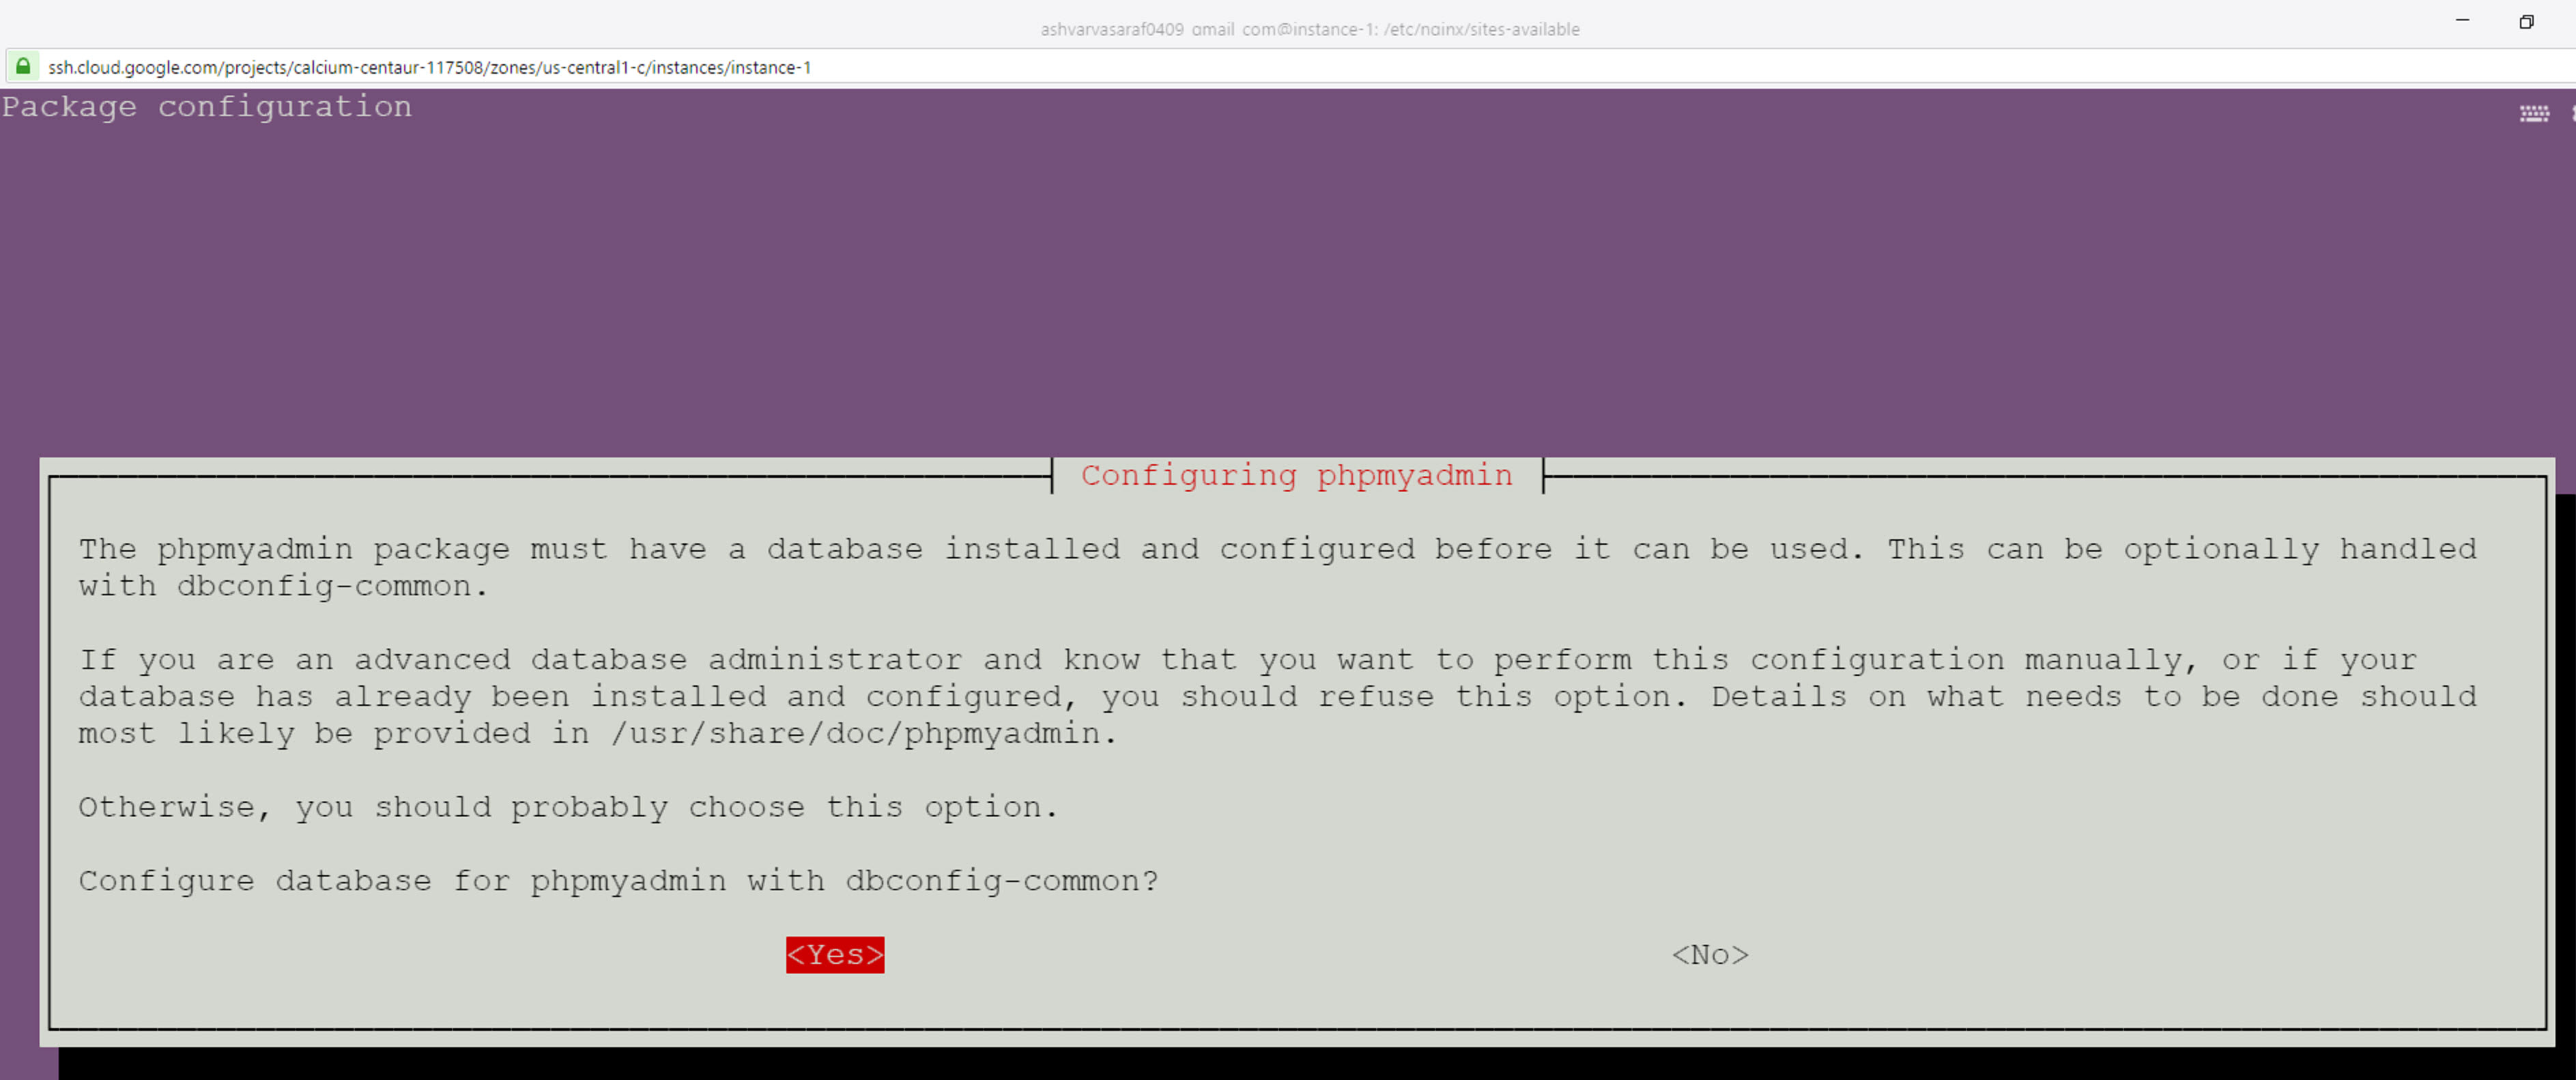


After providing the above information, Ubuntu will install and configure phpMyAdmin on our server.
Once the installation completed successfully try to access phpMyAdmin to the following URL
http://<ServerIP>/phpMyAdmin
NGINX unable to find the phpMyAdmin files. Why?
After the successful installation, we need to configure NGINX web server to find the correct phpMyAdmin files.
phpMyAdmin files are available in "/usr/share/phpmyadmin". To fix the 404 issue, we need to create the symbolic link from the installation files to our NGINX document root directory.
Execute the following command to create the symbolic link.
sudo ln -s /usr/share/phpmyadmin /var/www/html Finally, restart the PHP Fpm with the following command.
sudo systemctl restart php7.2-fpmAfter executing the above commands, our phpMyAdmin installation is finally operational.
We can confirm it by again visiting the following URL
http://<ServerIP>/phpMyAdmin
Step 2 Secure phpMyAdmin Installation
phpMyAdmin is designed to access the MySQL or MariaDB Database. A database is used to store important data for your organization or for your website. It is important to secure the data. If any authorized personnel gain access to phpMyAdmin, then the person can do anything with your data. To prevent the unauthorized or the malicious access to phpMyAdmin, we need to secure the phpMyAdmin installation. To secure the phpMyAdmin installation, we have two options.
At the time of phpMyAdmin installation, we use the following URL to access the phpMyAdmin panel.
http://<ServerIP>/phpmyadmin
Let's check How to change the phpmyadmin access path. For us, the phpmyadmin symbolic link is available in /var/www/html. Let's open the directory.
cd /var/www/htmlNext list down the directory content with the following URL.
ls -l
In the output check the line with phpmyadmin. We need to move it on mysecreturl. Use the following command to move phpMyAdmin symbolic link from phpmyadmin to mysecreturl
sudo mv phpmyadmin mysecreturl
For the second step to secure the phpMyAdmin, we need to enable the NGINX authentication gateway. Let's assume hackers able to find out our secret. What if you are using the NGINX authentication? Then hackers first need to guess the username and password for the authentication gateway to access the phpMyAdmin. Now we make, it is harder for hackers to hack on our server. To enable the authentication gateway we first need to create the authentication credentials. Nginx required the password to be encrypted using the crypt () function. The OpenSSL suite, which is already available on our include the functionality to encrypt a password. To create an encrypted password execute the following command in the terminal.
openssl passwdWe will be prompted for the new password. Enter and confirm the password. The OpenSSL utility will return an encrypted password. Copy the result value. For us, it is "yuw2tFQCbsnzQ"
Next, to enable the NGINX authentication we first need to create an authentication file. It used to store all the username and password. Execute the following command to create a new password file.
sudo nano /etc/nginx/phpmyadmin_passIn this file, we need to store the user-name and password. Store the user-name and password in the following format
username1: password
username2: password
I want to create a user with user name mayanksanghvi then I need to add the following line our phpmyadmin_pass file
mayanksanghvi:password_generatedby_OpenSSL

Save the file (Ctrl + O) and close the nano editor (Ctrl+X).
Finally, to enable NGINX authentication at http://<ServerIP>/mysecretpath we need to edit the NGINX config file. Open the config file in the nano editor.
sudo nano /etc/nginx/sites-available/defaultAdd the following line
location /MySecretPath  {
        auth_basic "Admin Login";
        auth_basic_user_file /etc/nginx/phpmyadmin_pass;
    }
Save the file (Ctrl + O) and close the nano editor (Ctrl+X).
To apply the above config file changes restart the NGINX web server
sudo service nginx restartAfter the NGINX server restart if you try to visit http://<ServerIP>/mysecret then first we need to enter the username and password available in phpmyadmin_pass file.

Installation of phpMyAdmin is done. In our next article, we will more about the following topics.
- Ubuntu 18.04 Install NGINX PHP MySQL on Google Cloud Compute Engine.
- Nginx custom error page.
- Configure a Domain, Create NGINX Server Block.
- Install SSL Certificates
- Enable GZIP compression
- MySQL Remote access from Ubuntu 18.04
- Varnish Cache Setup